 |
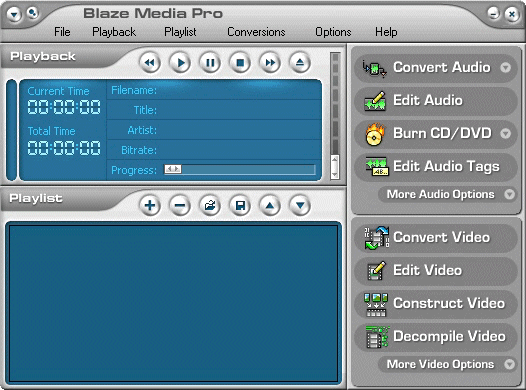
Playing an audio track in BMP couldn't be simpler, click File on the main menu and select Open. You will be presented with the Open Media File dialog window, locate the audio file you would like to play back. Double click the filename or click the Open button, the name of the track will be added to the Playlist which is the lower panel on the BMP interface.

To play a track from the Playlist simply highlight the entry by clicking it once and then click the Play button on the Playback panel.
From the right hand menu select the top entry Convert Audio.
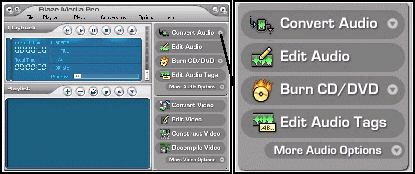
This will bring up the Audio Conversion sub menu, here you can choose to convert to MP3, WMA, OGG and WAV.
| Selecting Files For Audio Conversion | ||
| Firstly - select the files you wish to convert by clicking the Add Files button on the toolbar. The Add Files button will open the Files Selection dialog window, locate and select the audio files you wish to convert. |  | Add files |
| On the Files Selection dialog window click the Open button to add the files to the selected files list. | ||
| Should you wish to remove any files from the selected files list simply click the Remove button on the toolbar. |  | Remove files |
| When you are ready to convert the selected audio files click the Encode button on the toolbar. |  | Encode files |
CD Track(s)
Convert to MP3
Further Options allow you to set Mono/Stereo, Bitrate and Priority.
You will need to set the Conversion Frequency (khz). By default it is set at 44100 but you may change the value to any of the offered values.
See Selecting Files For Audio Conversion for file selection.
Convert to WMA
Further Options allow you to set the WMA profile.
See Selecting Files For Audio Conversion for file selection.
Convert to OGG
Further Options allow you to set Mono/Stereo, Bitrate and Frequency(khz).
By default Frequency(khz) is set at 44100 but you may change the value to any of the offered values.
See Selecting Files For Audio Conversion for file selection.
Convert to WAV
Further Options allow you to set Mono/Stereo, Bits Per Sample and Frequency(khz).
By default Frequency(khz) is set at 44100 but you may change the value to any of the offered values.
See Selecting Files For Audio Conversion for file selection.
MP3 Compression
This function allows you to change the compression ratio on MP3 audio formatted files.
See Selecting Files For Audio Conversion for file selection.
WAV Compression
This function allows you to change the compression ratio on WAV audio formatted files.
See Selecting Files For Audio Conversion for file selection.
Explanation Of Terms
Bitrate
The more bits used to store each sample in digital form, the more thorough the original signal's amplitude can be represented. This in turn can result in higher audio quality in the system. However, the larger the digital audio data size.
Frequency(khz)
Sets the frequency, or the number of times an event repeats, or number of vibrations produced by a signal or sound. Frequency is measured in Hz. One Hertz is one cycle per second.
Bits Per Sample
See Bitrate.
BMP allows you to create audio CDs that you can play either on your PC or on your HI-FI.
Click Conversions on the main menu and from the sub menu that appears select Audio CD Recorder.

This will open the Audio CD Recorder window.
| The first thing we must do is to create a list of tracks we would like to burn to our CD. Click the Add Files button on the top toolbar to open the Select Source Files window. Locate the file/s you would like to add to your CD and click the Open button. |  | Add Files |
| If necessary repeat the above step until you have added all the files you would like to burn to the CD. | ||
| If you would like to add an entire folder and all subsequent sub folders then click the Add Path button on the top toolbar. |  | Add Path |
| To remove a file from the list of files you have selected to burn to your CD, highlight the filename in the list and click the Remove Files button. |  | Remove Files |
| To remove all the files from the list of files you have selected to record click the Remove All Files button. |  | Remove All Files |
| Files are recorded to the CD in the order in which they appear in the list, you may change the ordering of a file/s by using the Move File(s) Up In List and Move File(s) Down In List buttons. |  | Reordering Files |
| To move a file up in the list highlight a file by clicking on it once, click the Move File(s) Up In List button. You will see that the file changes places with the file listed above it. This also applies to Move File(s) Down In List, naturally the file moves down one place. | ||
| Once you are happy with the files you have selected to record and they are in the order which suits you, you may begin to record them to a CD. Select the CD recorder in the Drive box and at which write speed you need located in the Write Speed box. From there it is a simple case of clicking the Record Audio CD button. |  | Record Audio CD |
The Progress indicator at the bottom of the window shows you the progress of the writing operation, also displayed is the amount of data being recorded.

The Audio Tag Editor allows you to embed information about the track into the actual file itself.
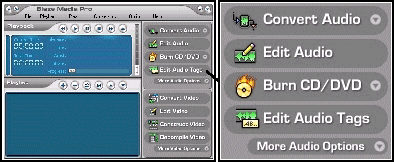
Select Edit Audio Tags from the right hand menu, this will open the Audio Tag Editor window.
The lower half of the window displays the file navigation boxes - use these to locate the audio files you would like to add or amend the audio tag data. Selecting a file in the files list pane will display the currently existing tag data in the ID3 Tag Information pane.
| Once you have entered/amended the tag data in the ID3 Tag Information pane click the Save ID3 Tag Changes button on the toolbar. |  | Save ID3 Tag Changes |
| To clear the Tag data click the Remove Existing Tag Data button on the toolbar, this will clear the tag data. |  | Remove Existing Tag Data |
BMP can merge or combine several audio files into one audio file. The audio file formats supported for this option are WAV, MP3, WMA, and OGG. You can also use audio from CD tracks and video files.
From the right hand menu select the bottom entry from the audio options More Audio Options.
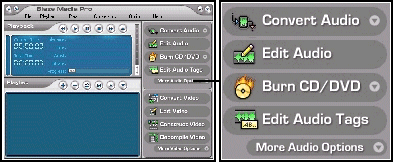
From the sub menu select Audio Merge.

See Selecting Files For Audio Conversion for information on how to select files.
| Once you have finished selecting files to combine in to one master file click the Combine/Cancel Toggle button on the top toolbar. This button both starts and stops the merge operation. |  | Combine/Cancel Toggle |
The Media Manager allows you to manage your media files by renaming, copying, moving, and playing them.
Click File on the main menu and then select Media Manager.
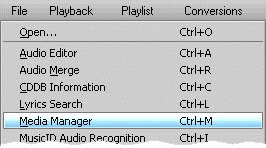
The Media Manager menu has two entries File and Playback.
File:
This menu item hosts all the core commands, from here you can Rename, Copy, Move etc. the file/s displayed in the files list, which is the lower pane on the Media Manager window.
Playback:
This menu item hosts the commands necessary for playing the tracks in the files list.
The main panel of the Media Manager window is a graphical display of the currently playing file. This is a visualization of the audio data, it represents the peaks, ranges, and content of the audio file.
When a video file is playing, the actual video is shown there instead.
The Lyrics Search command allows you to search for music lyrics on the web by entering the artist name or song title.
Click File on the main menu and then select Lyrics Search.
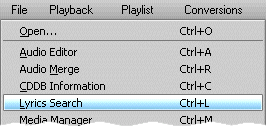
Once the Lyrics Search window has opened select whether to use the Artist or Song Title as the Search Type.
In the Search For box enter the lyrics to search for.
Click the Find button.
When BMP returns the list of music it has found matching lyrics for you may save these lyrics to the BMP library.
Clicking the Library button displays the Lyrics Database dialog box. This dialog box saves the lyrics that you find on to your computer so that you may use the lyrics at any time.
You have the option to add, edit and delete items using this window.

Locate the video file you would like to play.
Once you have selected the video file the Video Player window will open and your video clip will be played.
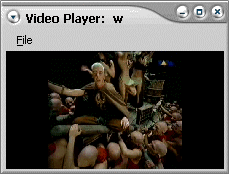
The File menu command hosts the player commands such as Stop, Resume as well as the various Screen Modes.
The Video Player can be set to Full Screen mode as well as to a user defined size.
See Recording an audio track to CD for more information.
From the right hand menu select the entry Edit Video from the lower pane.
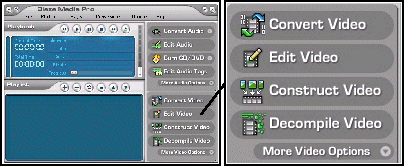
This will open the Video Editor window.
With BMP you may modify each frame of a video clip by using the same operation upon them.
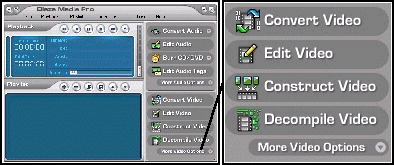
From the right hand menu select More Video Options, then select Video Batch Processing.
This will open the Video Processor window.
| Firstly - select the files you wish to process by clicking the Add Files button on the toolbar. The Add Files button will open the Files Selection dialog window, locate and select the video files you wish to decompile. |  | Add files |
| On the Files Selection dialog window click the Open button to add the files to the selected files list. | ||
| Should you wish to remove any files from the selected files list simply click the Remove button on the toolbar. |  | Remove files |
| Next, decide what process you would like to apply to each frame of the selected video clips by using the Operation drop down list. If you select the JPG format you may also set the compression ratio within the JPEG Quality box. | ||
| When you are ready to proceed click the Process Video File(s) button on the toolbar. |  | Process Video File(s) |
Converting the format of a video file is a snap with BMP.
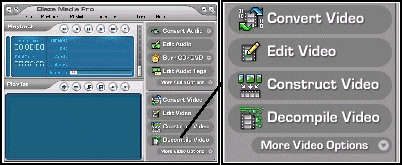
Select Convert Video from the right hand menu.
This will open the Video Converter window.
| Firstly - select the files you wish to convert by clicking the Add Files button on the toolbar. The Add Files button will open the Files Selection dialog window, locate and select the video files you wish to convert. |  | Add files |
| On the Files Selection dialog window click the Open button to add the files to the selected files list. | ||
| Should you wish to remove any files from the selected files list simply click the Remove button on the toolbar. |  | Remove files |
| Next, decide which video format you would like to convert the existing files to by selecting an option in the Output Format drop down list. | ||
| When you are ready to proceed click the Decompile button on the toolbar. |  | Decompile |
The Video Constructor gives you the ability to create a video clip from a series of still images.

Select Construct Video from the right hand menu.
This will open the Video Constructor window.
| Firstly - select the files you wish to add to the video clip by clicking the Add Files button on the toolbar. The Add Files button will open the Files Selection dialog window, locate and select the image files you wish to add. |  | Add files |
| On the Files Selection dialog window click the Open button to add the files to the selected files list. | ||
| Should you wish to remove any files from the selected files list simply click the Remove button on the toolbar. |  | Remove files |
| Images are added to the video clip in the order in which they appear in the list, you may change the ordering of a file/s by using the Move File(s) Up In List and Move File(s) Down In List buttons. |  | Reordering Files |
| When you are ready to compile your video clip from the list of images click the Create Video button on the toolbar. |  | Encode files |
A unique feature of BMP is the ability to break a video file down into frames and save those frames as individual image files.

Select Decompile Video from the right hand menu.
You will be presented with the Video Decompile window.
| Firstly - select the files you wish to decompile by clicking the Add Files button on the toolbar. The Add Files button will open the Files Selection dialog window, locate and select the video files you wish to decompile. |  | Add files |
| On the Files Selection dialog window click the Open button to add the files to the selected files list. | ||
| Should you wish to remove any files from the selected files list simply click the Remove button on the toolbar. |  | Remove files |
| Next, decide which image format you would like save the resulting files in by selecting an option in the Output Format drop down list. If you select the JPG format you may also set the compression ratio within the JPEG Quality box. | ||
| When you are ready to decompile the selected video files click the Decompile button on the toolbar. |  | Decompile |
| Decompiling video can result in large amounts of individual image files - an average size music video can result in several thousand images. | ||